How to Convert iTunes Library to MP3
SOURCE: https://www.spotikeep.com/blog/convert-itunes-library-to-mp3.html
Q: How can I convert iTunes library songs to mp3? I really want to transfer the music files to my USB and then play on my car.
Nowadays, most music files on the iTunes Store are unprotected. Users can purchase the songs from it. However, since the iTunes Store stopped selling protected songs in 2009, you cannot find so many songs that fit your needs because they are protected by DRM and you cannot convert them into MP3.
Any way to convert iTunes songs to MP3? Yes. In this article, we are going to introduce you to the 2 effective methods to convert your favorite songs in your iTunes library to MP3.
Easy Method to Convert iTunes Library to MP3
Actually, iTunes has its own audio converter for users to convert iTunes songs to MP3. However, it will cause the reduced sound quality during the conversion between AAC and MP3. For someone who loves high-quality listening experience, this method might be suitable for you, although using iTunes is the easiest way to convert iTunes library songs to MP3.
Convert iTunes Songs to MP3 on Windows
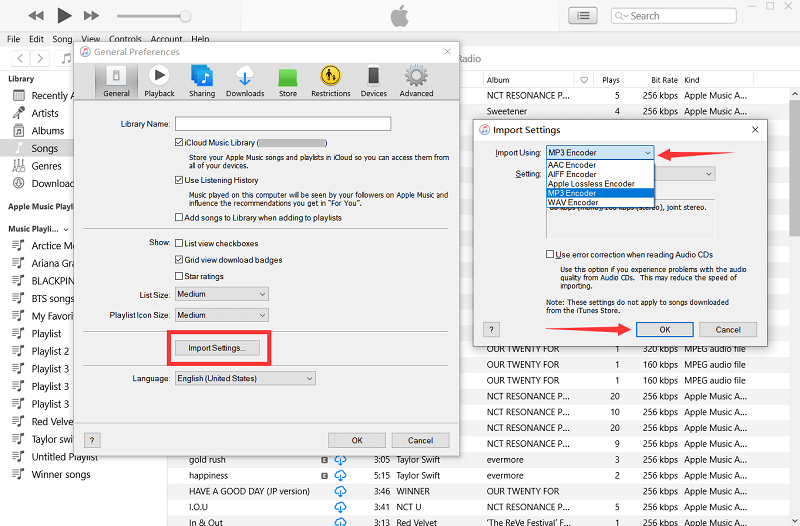
Step 1. Navigate to the Preferences window on iTunes by clicking on Edit.
Step 2. Click on the Import Settings option in the General tab.
Step 3. In this window, we change the Import Using to MP3 Encoder. Besides, you can change the saving quality by clicking the Setting pull-down menu. Then, click OK to confirm your settings.
Step 4. Select the music you want to convert in the Library. Then, click File > Convert > Create MP3 Version to duplicate the song in MP3 format. When the conversion is finished, the MP3 file will be listed next to the original file.
Step 5. Right-click on the file name and choose Show in Folder to locate the converted MP3 song on your computer.
Convert iTunes Songs to MP3 on Mac
Step 1. Launch the Apple Music app on Mac. Then, choose Music > Preferences in the menu bar.
Step 2. Go to Files tab, then click Import Settings.
Step 3. Open the pull-down menu of Import Using, and choose MP3 Encoder. Then, click OK.
Step 4. Select the song in your library. Then, click File in the menu bar > Convert > Create MP3 Version.
Step 5. Find the new MP3 file in your library. Right-click on it to choose Show in Folder to access the file.
NOTE: Fail to Convert?
Can I convert all songs from iTunes library to MP3?
No. It is not garuanteed that all songs in your pre-existing library can be converted.
When you try to convert iTunes songs from the library to MP3, you may meet a pop-up window, warning that protected songs are not allowed to be converted. That's because of the DRM restrictions of Apple Music files. To solve this situation, it's highly recommended to move on to the next method to convert iTunes library to MP3.
How Can I Convert iTunes Protected Songs to MP3 as Well?
iTunes music like Apple Music files are protected DRM so you cannot directly convert them into MP3 on iTunes or Apple Music app. You may want to play the song on your car via USB or keep the songs forever after canceling the subscription. Due to the restriction of DRM, SpotiKeep Apple Music Converter can be your good option to convert iTunes protected songs to MP3.
SpotiKeep Apple Music Converter, a desktop program for Windows and macOS computers, is created to remove DRM restriction from Apple Music files. It consists of DRM Removal and Apple Music Converter. With it, you can get DRM-free Apple Music files in MP3. As a program designed for beginners, SpotiKeep Apple Music Converter is very easy to master. For anyone, you just need 3 steps basically to convert iTunes protected to MP3. Next, let's see how to convert iTunes library songs to MP3.
Step 1. Install SpotiKeep Apple Music Converter
Download the latest SpotiKeep Apple Music Converter on the official site. It can be used on Windows and Mac computers. Please make sure you download the right one. Then, install it on your computer.
Besides, to convert Apple Music songs, we will need the help of iTunes to read your created playlist on Apple Music. Therefore, please make sure you've installed the latest iTunes and log in with your Apple ID.
Step 2. Sync Apple Music Songs via iTunes
When you launch SpotiKeep Apple Music Converter, you will find iTunes is running automatically. Please do not turn it off. Go back to the Apple Music Converter, please click the Refresh button to sync your created Apple Music playlists via iTunes.
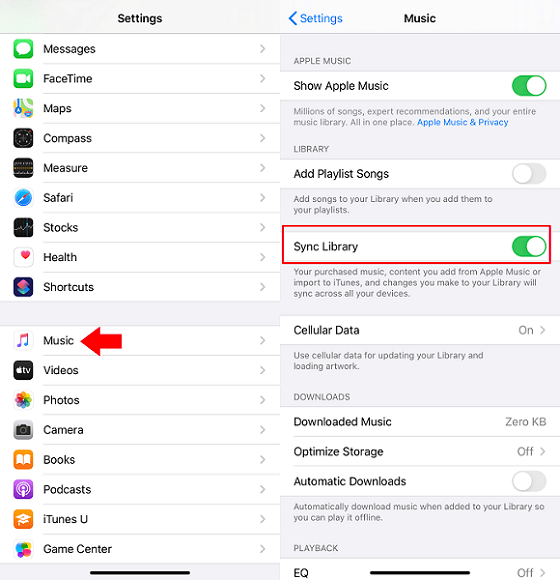
If you fail to sync Apple Music playlists, please head to Apple Music settings on iPhone and turn on the Sync Library option. Then, try again.
Step 3. Choose the Songs You Want to Convert
SpotiKeep Apple Music Converter supports to convert one or more songs at one stop. Select a playlist, then check the song you need on the upper right pane.
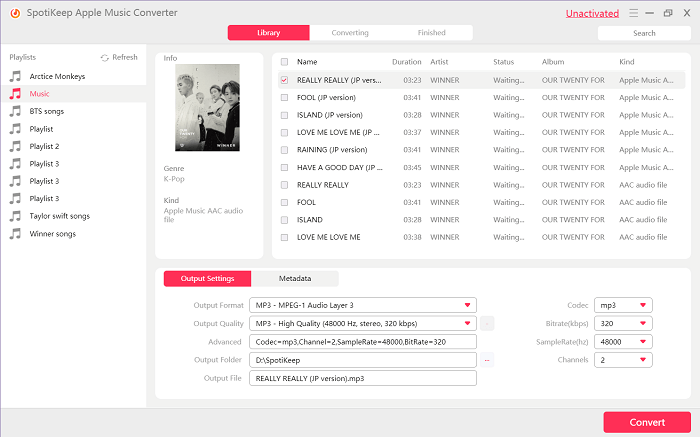
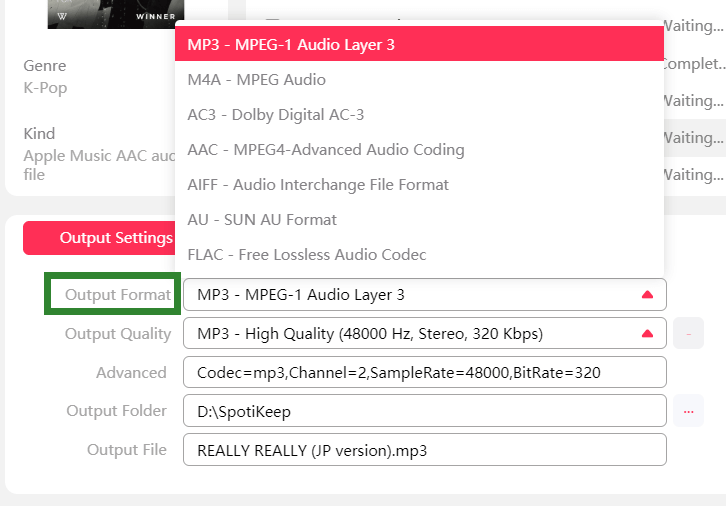
Step 4. Set MP3 as the Output Format
Head to the Output Settings section, you can choose the preferred output format and quality. By default, converted files will be saved in MP3 format. Choose a proper quality for the converting Apple Music song.
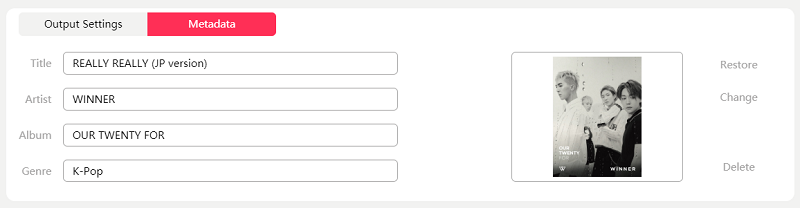
Step 5. Edit Metadata Info (Optional)
SpotiKeep Apple Music Converter is able to preserve the ID3 tags and Metadata information. You can move to the Metadata section to edit the information of the song if you need.
Step 6. Convert Apple Music Song to MP3
In the final step, you just need to click on the Convert button to start the Apple Music to MP3 conversion. Without a long time, converting Apple Music songs will be moved to the Finished tab.
That's so much about how to convert songs from iTunes to MP3 and convert Apple Music files to MP3. Both of these two methods are very easy to master. You can choose a suitable one to convert your favorite music.


Comments
Post a Comment