The Best Free Screen Capture Software on Windows 10/7/XP
SOURCE: https://www.vidpaw.com/topics/best-screen-capture-software-windows.html
People need screen capture software for many reasons. For example, they may need a screen capture software to record the instant message that occurred on the computer, save the valuable moments that won't happen again, mark down the important details from a video/audio playing on the screen, etc.

If you are also seeking for one, This blog can help you. The best free screen capture software - RecordAnyVid - will be introduced to you, which is the best choice for Windows 10/7/XP users. So if you are a user of Windows 10/7/XP and also finding for the best screen recorder, scroll down to get it right now!
CONTENTS
Part 1. Features on RecordAnyVid
Part 2. How to Freely Record Computer Screen on Windows 10/7/XP
Here are some main features of this free screen capture software.
① Smart Video Recorder for free personalizing
RecordAnyVid's Video Recorder gives users full charge on what they want the output recording to be in their own preferences. They can define the recording area, customize the audio volume, and edit the video before outputting as they need.
② Markdown every sound with its Audio Recorder
RecordAnyVid also allows users to record audio only, so that the music, songs, etc. can be saved with this Audio Recorder with ease. Then users can output the recordings to common audio formats such as MP3/AAC/M4A/WMA with high quality.
③ Take snapshot whenever you need
While recording the video/audio, you can take a snapshot to capture certain areas on your screen and save it to a picture format. With RecordAnyVid, you can take any snapshots as you want at any time, regardless of whether the recording is possessing.
④ Functional shortcuts to use RecordAnyVid easily
RecordAnyVid allows users to set the shortcuts for using this screen capture software more easily. You can use the hotkeys to start or stop the recording at any time or take snapshots directly. Take full charge of this application and make it become your personal screen recorder!
There are more features waited for you to explore. RipAnyVid is the best choice for recording screen on both Windows and Mac. In the following, you can also see how you can use it to start your first recording. Keep on reading.
STEP 1. Install RecordAnyVid on Windows10/7/XP
In the first place, you need to go to VidPaw and get to the RecordAnyVid product page at first. Since you are using a Windows 10/7/XP device, so choose the Windows version. And we also suggest you try the free version ahead of all. Then simply click the download button to install RecordAnyVid on your device.
STEP 2. Pre-settings in Video Recorder
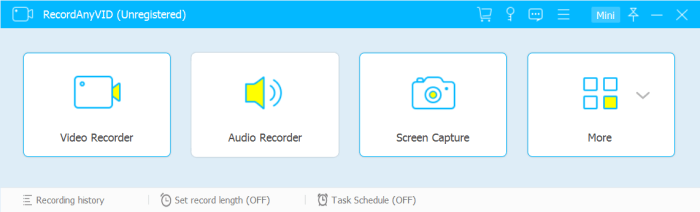
Launch RecordAnyVid on your computer. On the interface, there are four option - "Video Recorder", "Audio Recorder", "Snapshot", and "More". Choose "Video Recorder" if you are going to record the screen on your Windows 10/7/XP. Then please also customize the recording area, system/microphone volume, other preference settings according to your needs.
STEP 3. Start Recording the Screen
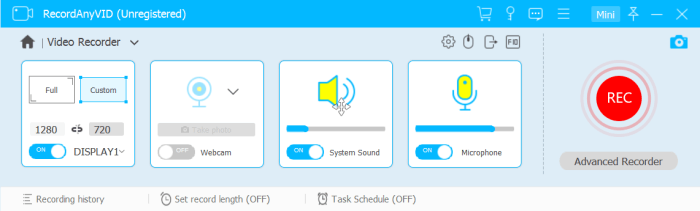
After the settings, click the REC button on the right side of the Video Recorder interface, and RecordAnyVid will start to capture the screen for you.
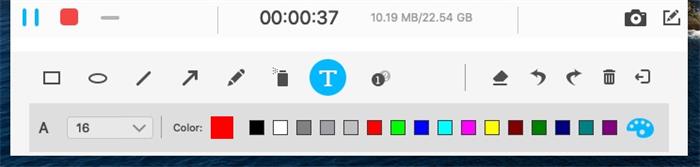
Note: During the recording, you can use the drawing panel provided by RecordAnyVid to paint the video as you like.
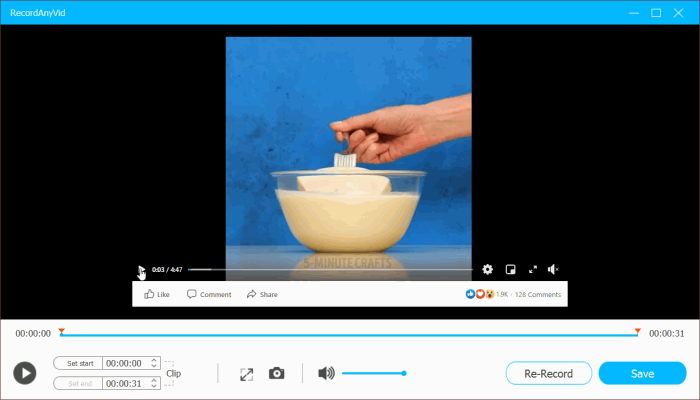
STEP 4. Save the Recording
When the video you are recording stops playing, end the process by clicking the stop icon on the recording bar. Then RecordAnyVid will bring you to the previewing window. If you are satisfied with the video, just click "Save" and choose an output folder to save the recording on your Windows 10/7/XP.
Unlike the recording? Click "Re-record" and you can cancel the video and start another recording process again.
In my opinion, the best screen capture software should be functional, stable, easy to use, and user-friendly. These features are all shown in RecordAnyVid. Therefore, it can be the best screen recorder I recommend to Windows 10/7/XP users. You can have a try.
People need screen capture software for many reasons. For example, they may need a screen capture software to record the instant message that occurred on the computer, save the valuable moments that won't happen again, mark down the important details from a video/audio playing on the screen, etc.
If you are also seeking for one, This blog can help you. The best free screen capture software - RecordAnyVid - will be introduced to you, which is the best choice for Windows 10/7/XP users. So if you are a user of Windows 10/7/XP and also finding for the best screen recorder, scroll down to get it right now!
CONTENTS
Part 1. Features on RecordAnyVid
Part 2. How to Freely Record Computer Screen on Windows 10/7/XP
Part 1. Features on RecordAnyVid
Although RecordAnyVid is an emerging screen recorder in the market, its stable and outstanding recording performance makes it well known at a rapid speed. Until now, RecordAnyVid got many users and the number is still increasing. People use the program to record all kinds of screen activities on the computer, including online video/audio, gaming moments, online meetings/Facetime calls, and so forth.Here are some main features of this free screen capture software.
① Smart Video Recorder for free personalizing
RecordAnyVid's Video Recorder gives users full charge on what they want the output recording to be in their own preferences. They can define the recording area, customize the audio volume, and edit the video before outputting as they need.
② Markdown every sound with its Audio Recorder
RecordAnyVid also allows users to record audio only, so that the music, songs, etc. can be saved with this Audio Recorder with ease. Then users can output the recordings to common audio formats such as MP3/AAC/M4A/WMA with high quality.
③ Take snapshot whenever you need
While recording the video/audio, you can take a snapshot to capture certain areas on your screen and save it to a picture format. With RecordAnyVid, you can take any snapshots as you want at any time, regardless of whether the recording is possessing.
④ Functional shortcuts to use RecordAnyVid easily
RecordAnyVid allows users to set the shortcuts for using this screen capture software more easily. You can use the hotkeys to start or stop the recording at any time or take snapshots directly. Take full charge of this application and make it become your personal screen recorder!
There are more features waited for you to explore. RipAnyVid is the best choice for recording screen on both Windows and Mac. In the following, you can also see how you can use it to start your first recording. Keep on reading.
Part 2. How to Freely Record Computer Screen on Windows 10/7/XP
In addition to the advantages introduced above, the largest benefit RecordAnyVid provides to its users is the simple procedures to use the recorder. So in the following, you will see the guidance on how to record computer screen using a Windows 10/7/XP device.STEP 1. Install RecordAnyVid on Windows10/7/XP
In the first place, you need to go to VidPaw and get to the RecordAnyVid product page at first. Since you are using a Windows 10/7/XP device, so choose the Windows version. And we also suggest you try the free version ahead of all. Then simply click the download button to install RecordAnyVid on your device.
STEP 2. Pre-settings in Video Recorder
Launch RecordAnyVid on your computer. On the interface, there are four option - "Video Recorder", "Audio Recorder", "Snapshot", and "More". Choose "Video Recorder" if you are going to record the screen on your Windows 10/7/XP. Then please also customize the recording area, system/microphone volume, other preference settings according to your needs.
STEP 3. Start Recording the Screen
After the settings, click the REC button on the right side of the Video Recorder interface, and RecordAnyVid will start to capture the screen for you.
Note: During the recording, you can use the drawing panel provided by RecordAnyVid to paint the video as you like.
STEP 4. Save the Recording
When the video you are recording stops playing, end the process by clicking the stop icon on the recording bar. Then RecordAnyVid will bring you to the previewing window. If you are satisfied with the video, just click "Save" and choose an output folder to save the recording on your Windows 10/7/XP.
Unlike the recording? Click "Re-record" and you can cancel the video and start another recording process again.
In my opinion, the best screen capture software should be functional, stable, easy to use, and user-friendly. These features are all shown in RecordAnyVid. Therefore, it can be the best screen recorder I recommend to Windows 10/7/XP users. You can have a try.


Comments
Post a Comment